Tuesday, August 5, 2014

Happy progress - about health

Here's some happy progress that I want to share. 
Not related to crafts, but related to health. This matters to everyone of us. 

One of my beloved family members has been suffering from long-term constipation due to the amount of western medications he has been receiving throughout the years due to complications of several chronic illnesses. His doctor prescribed a large variety of pills that are supposed to help relieve the constipation - which didn't quite do the job without causing side-effects which made things even more difficult.

Lots of readings have been done to help. Lots of natural remedies have been experimented. Lots of cheering on in sticking to therapies as well. Apples in the early morn with empty stomach, full bowls of veggies per meal, tomato juice, prunes, walnuts, 3 fruits per day, camellia seed...  and tonnes of other little stuffs that have been tried. Note that, they were experimented with persistence and dedications. Still. Results not very optimistic.

Finally - finally - something works - a teaspoon of olive oil mixed into the bowls of veggies in each meal. 

This is something that, no doctors we know of have ever thought of. 

This reminds me of the story of Thomas Edison. How many ingredients have been tried before the invention of the first light bulb?

If you believe that - medical insurance is good enough to take care of your body - I just want to remind you sweetly that at times you just needa look out for yourself. Doctors are helpful most of the times, but not 100% of the times. The responsibility is always in our own hands. For you, and your loved ones. 

Monday, July 28, 2014

How to use instagram to market your crafts business


I've tried instagram for a week to observe how this tool could help grow my craft business. And I found out:

1) It's not necessary to be too "business-like" or "professional-looking". 
     You want to come off like a normal human being not a businessman. Just connect with people via comments or likes. Make neat comments to posts if you have something nice to say. You know, whenever you like a post, people see your name in their notifications, as long as they're not popular to a point that they get 100 likes in an hour.. Especially for folks who don't get as many as a hundred likes on their posts, when you liked their posts they might take a look at you.

2) Give other people comments. 
     When you comment on a post, other viewers could see your instagram username + profile picture - which could be your business name or logo. Free advertising! Of course don't come off as "Please visit my etsy site on blahblahblah."

3) If you want to reach your specific audience, you could do some homework investigating on tags. 
     Some people search posts of similar sort by clicking on tags. For example, somebody saw a very beautiful washi egg - and they want to see more eggs of this type. They would click on the tag that says #washieggs. For my crafts - I look up a list of egg related, or handmade craft related, or asian craft related tags. Especially if they're popular tags - there's more chance of being found.

    For example, what I could do is, go and "like" the posts of asian crafts or egg crafts. Of course you might want to make good use of your profile picture as this is gonna help draw attention.

    Here are some links that summarize popular tags:
http://www.tagsforlikes.com/
http://instagramtags.com/
http://top-hashtags.com/instagram/

Updates on Aug 4th - I experimented with the popular tags - added a long list of tags and see if it really works. What I found is - it DOES NOT help when you add like 20 hash tags. Some people think that it indicates you're desperate for likes. So - less is more!!!

4) In general, Instagram users like to see beautiful things.  
     So, on a daily basis, keep taking pics of beautiful things or special things that attract you. Apart from reaching out to your specific audience, you need some publicity - more followers. Instagram has a very instant nature - posts sink after a short while. IF you want your posts to reach more people, you need to keep the traffic coming and have people "like" your posts.


Updates on 4th August:
Just found a huffletonpost articles about drawing audience, which is pretty helpful:
http://www.huffingtonpost.com/2014/07/02/instagram-followers_n_5537524.html

Another article which suggests a pretty "extreme" method of attracting followers:
http://www.wikihow.com/Get-1k-Followers-on-Instagram


Friday, May 2, 2014

Leftovers from Scan N Cut - they have a use!

Wow it's been a long time since my last post! Have been very busy.

Today I'm cleaning up my studio and found some vellum leftover from using Scan N Cut. It looked awesome and something clicked - why not try and use them as stencils? 

Vellum is absorbs water ink super slowly so one could reuse it as stencils!! Lovely isn't it? 

Here's the picture: 

Friday, April 4, 2014

Egg craft - how to prepare a clean and empty eggshell

Easter's coming!! I've blown out a lot of eggs and here is a how-to for blowing out eggs in large quantities. This tutorial is a bit long as I've done it too many times and have made tonnes of mistakes there're lots of stuffs I wanna share!

Tools:

- Bulb syringe (you can get it from the pills aisle in the supermarket)

- A Large bowl
- pin
- paper clip
- eggs
- paper towels
- lunchbox (big enough for the egg content!!)


Steps to empty egg content:

1) Fill the large bowl with warm tap water
2) Let the eggs sit in the warm water for 10 mins. While waiting, clean all the equipment and egg surface.
3) Dry one egg with paper towel. Let other eggs bath in warm water to stay warm.


4) Use the pin to punch a hole on the south pole and north pole. Approach it gently then gradually increase your force. Wipe away the powdery debris after punching hole.


5) At the south pole, poke a few more holes that are IMMEDIATELY NEXT TO the first hole (i.e. such that the holes will become a big hole altogether). Then you will have a 3mm diameter hole at the south pole.


6) Unwind the paper clip a bit, so you'll have a stirrer. Stick it into the egg from the south pole. Stir the egg yolk in circles gently. This is to break the egg yolk.


7) Above a lunchbox, hold the egg upright and apply the bulb syringe at the north pole, make sure the mouth is tightly in contact with the egg shell. Squeeze the bulb gently, go slowly to begin with. Egg content should start dripping into the lunchbox.


8) as you squeeze the bulb if you could feel a lot of resistance which prevents the egg content from coming out, use your stirrer again, and give the yolk a few stirs. Then try the bulb again.
9) Keep repeating step 7) and 8) with lots of patience until all the egg content is out.

Note: Don't drop the eggshell!!! I dropped one onto the kitchen floor by mistake. Hard work all gone. The strong arch structure of the egg shell is destroyed by punching a hole at the poles. It is extra fragile.

Steps to clean the egg content residue:
1) Now you've got like 10 empty egg shells.
2) Fill the large bowl with warm water.
3) Squeeze the bulb syringe and let it be filled with warm water.
4) Squeeze the water in from the bulb syringe.
5) shake-shake-shake!
6) Empty the water inside the egg by pushing air into the egg with the bulb syringe. You shall see the yolky stuffs coming out too.
7) Repeat steps 3) to 6) again and again, until the egg is cleaned thoroughly.


Saturday, March 29, 2014

Home-made spray glue

Found a how-to about home-made spray glue!!!
I'll try it out once I get through the storms... Spray glue is superb when applying glitter.

http://www.cutoutandkeep.net/projects/spritz-glue

Wednesday, March 26, 2014

Watch out! Scan N Cut Canvas treats broken line as solid line

Half an hour ago I just found out another shocking fact about Scan N Cut Canvas..

I am using Inkscape to make a cut file for a gift box. I want some line to be broken lines so I select those lines then choose "broken line" in the stroke properties. I opened the final svg in Internet Explorer afterwards to make sure everything looks as normal as what I saw in Inkscape. 

Here comes the surprise. After uploading the svg file to Scan N Cut canvas, I found that it doesn't know stroke properties. In another word, even if your svg file has broken line and you see it standing there, Scan N Cut still considers it as a solid straight line. 

In the end I am doing it the "backward" way. Space out short little lines so that scan N Cut could convert it to fcm file. 

It is indeed a blow. 


Monday, March 17, 2014

Inkscape tutorials

I tried to read the tutorials/manual that came with the Inkscape software but it made me doze off so I hunted down some videos instead. This guy created a series of Inkscape tutorials which were very well elaborated and in HD. I get stuck with curves but the videos did help.

Basics - 
http://www.youtube.com/watch?v=zUIOEXssTSE

Tutorial 4 - 
http://www.youtube.com/watch?v=_qqTAjBaeJ01

Wednesday, March 12, 2014

Clean the cap too!

Sunshine is rare here so I'm grasping all chances to finish off as much photo stuffs as possible these two days (yes only two days of sunshine in I don't know how long)! My camera lens catches on some dust after use which is totally normal but I noticed that the lens cap could be the culprit too! 

The plastic cap carries quite some electrostatics, which love dusts. While shooting a photo the cap is either on the table or in my pockets. Dust sneaks into the cap! 

So I decided that apart from blowing dusts off the lens, it is a good idea to blow dust off the inside of the lens cap too. 

Sunday, March 9, 2014

How to make Asian paper fan of 2 inches width

Fan is something invented in ancient Asia when there was no air conditioning. Nowadays paper fan is still used in daily life. If you look at the Japanese luxury paper you always find fan in the design. 

Here is a tutorial of how to make a paper fan. It could be used for your crafty projects which goes well with a tint of Asian element. 

Equipment: 

Scoring board
Embossing tool or a mechanic pencil with removed lead stick
Paper (anything but thick cardstock) 
scissors
glue
pencil 

Step1) Cut out a piece of paper - 5cm X 7cm. This will make a fan of width ~ 2 inches

Step2) Score it at 1/4 inch intervals. 

Step3) Fold it and make a crease. 

Step4) Mark with pencils - on the the first segment as shown in this picture. 

Step 5) Cut out the corners, including your pencil markings. 

Step 6) Fold according to the scored lines. 

Step 7) Remember in step 3 you made a crease? Do it again to strengthen it. Then apply glue at the gates as shown. Squeeze the two gates together. 
Step8) Almost done. Still needa do some strengthening. 


Step9) The lower folds could still be a bit lose. Apply a drop of glue at the center. 


Step10) Squeeze it real hard. Finished!! 


The end are flat surface for applying double sided tape or glue. Perfect for card making!!


Hope it helps. :) 

Thursday, March 6, 2014

Vector Graphics

I'm a vector graphic dummy. A complete idiot outside MS Paint. 

I hate to bug my designer friends as it takes so much effort to design a logo... So I'm trying to make use of free stuffs online and work some magic.. 

Look what I've found: 

1) Inkscape - a free tool for making vector graphics. The software comes with tutorials. 

2) http://www.japanvector.com/   -  Free japanese vector graphics!! They're very beautiful and they allow free downloads for personal use or commercial use (most of the graphics).

3) https://kuler.adobe.com/create/color-wheel/  - Awesome colorwheel. Very easy to use. 

Wednesday, February 26, 2014

Tax deduction for online sellers

Doing readings and researches... 

Don’t Miss Out: Often Missed Tax Deductions for Sellers

http://www.etsy.com/blog/en/2010/dont-miss-out-often-missed-tax-deductions-for-sellers/

Monday, February 24, 2014

Angel Policy

Have you heard of the Angel Policy? Some companies that manufacture stamps require you to get permission from them if you are to use their stamps on items that are to be sold. Some other companies are more "Angelic" and doesn't mind. 


It's good to have an idea who the angels are so you could buy their stamps without worrying about legal issues. 


Rubber Stamp Angel Company List A - I
http://www.bellaonline.com/articles/art60108.asp

Rubber Stamping Angel Company List H - Q
http://www.bellaonline.com/articles/art60111.asp

Rubber Stamp Company Listing R - S
http://www.bellaonline.com/articles/art60110.asp

Rubber Stamp Angel Companies List T - Z
http://www.bellaonline.com/articles/art60109.asp

Friday, February 21, 2014

Pricing your craft items

I'm afraid that this blog might includes a lot of sharing of links... but I want to share good reads!

Found an insightful and honest post about pricing crafts work. The writer mentioned the theoretical pricing model, the reality of pricing models of the majority of crafters, and the progression of your price model as you get more experienced.

http://whatthecraft.com/how-to-pricing/

Broken Glass

[Nerdy post warning]

I hoard beautiful things. From craft stores and daily life.

Yesterday we went to a welder's shop as the roll cage of the racecar needs to be relocated. There were 8 vehicles or so and one of them looked like Mater in the Pixar movie - Cars.


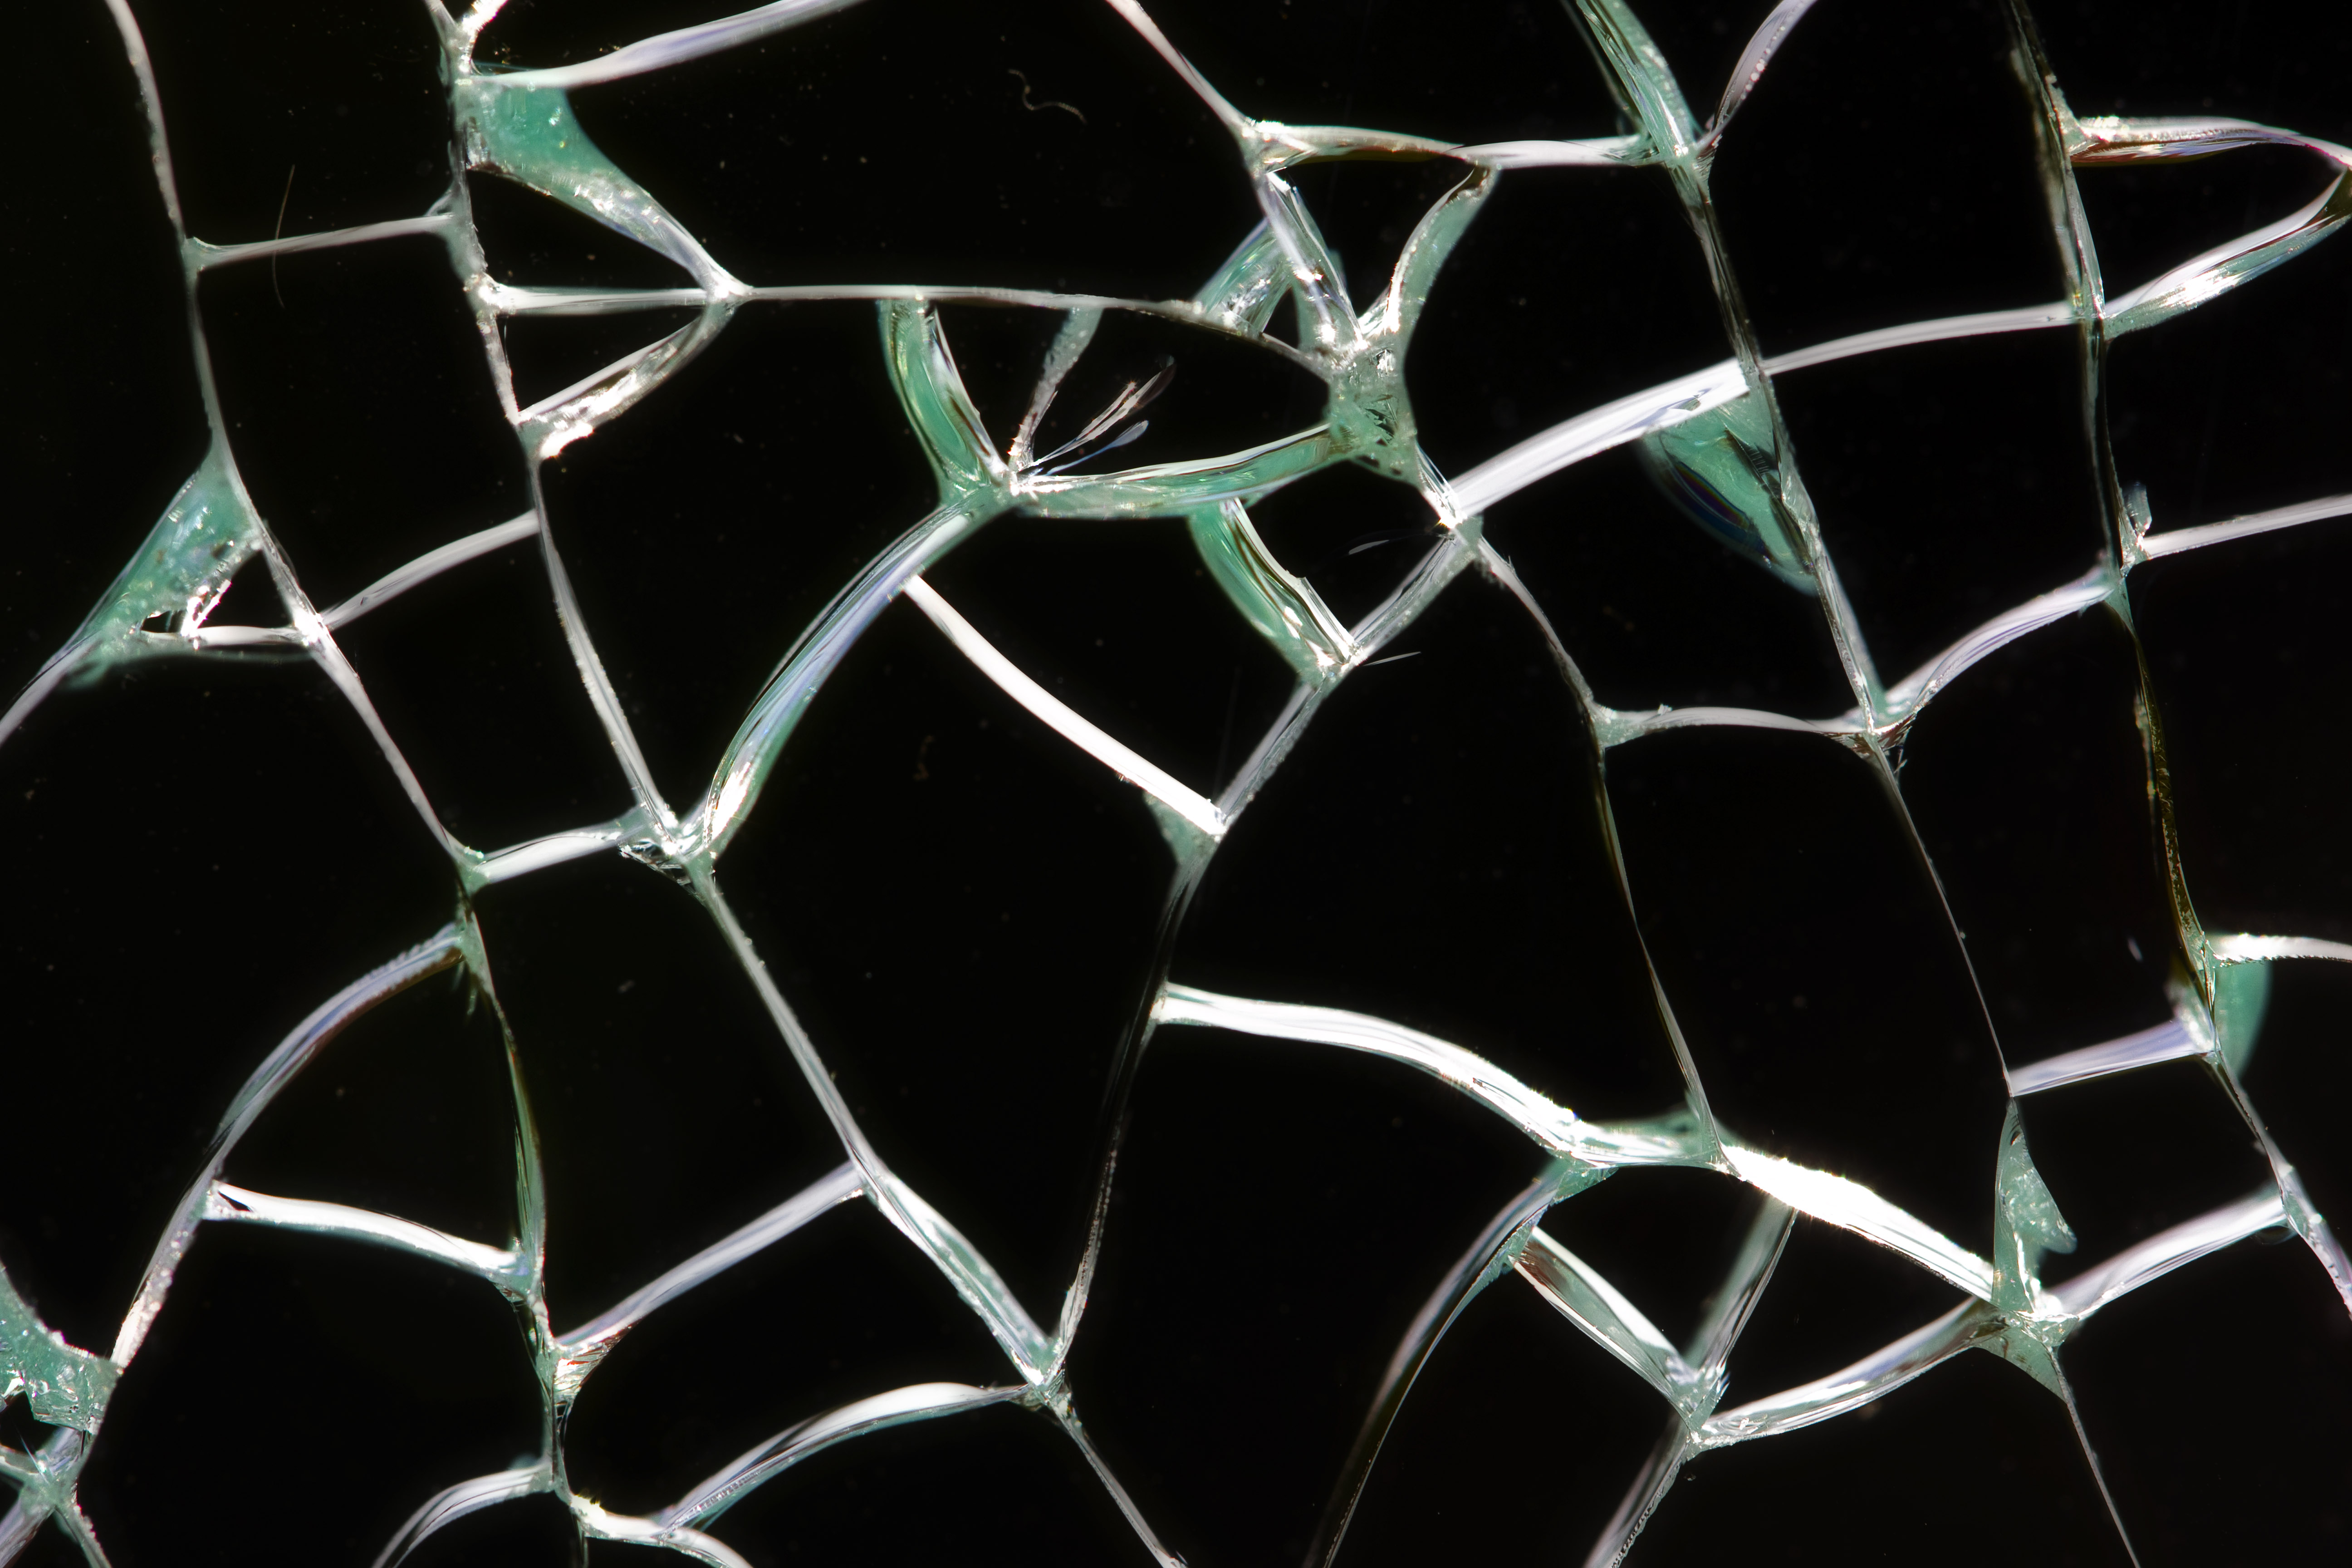
In front of the Mater there stood a broken windshield. My first face-to-face encounter with broken glass. I'd say the lines looked 3-dimensional (even though in maths line is considered 1-dimensional). It was so beautiful. The refraction reminded me of crystals/diamond but in broken glass there's something more than that. I believe that broken glass could be a great photography project (note to self).

Here's a web picture of broken glass from Google search.


Wednesday, February 19, 2014

Print your own washi paper - online tool

Found an online tool which allows one to print washi paper at home! If you have a laser printer at home it'll definitely be useful for you. Laser printers are more cost-effective than the ink ones.

1) Good for wrapping gifts.

2) washi origami paper DIY.

Somehow origami paper is not cheap in the states and when you buy a pack you're buying both the BEAUTIFUL patterns and the LESS BEAUTIFUL patterns.

Here's the link:
http://cp.c-ij.com/en/contents/2004/list_45_1.html


Monday, February 17, 2014

Viscous bubble solution - interesting wrinkles

Accidental discovery! A few weeks ago I tried some homemade bubble recipes and made a bubble solution. After a fun afternoon the solution laid forgotten.

I looked at it yesterday and the surface is very interesting. The solution become so viscous and the surface carries a lot of wrinkles. The wrinkles remind me of making soup or heating milk in a pot. When it's almost done there's always a thin layer of wrinkled surface of hot soup/milk. Good to know that it could be re-produced a more permanent way! Would be fun to inject some air bubbles...


Saturday, February 15, 2014

Belated Happy Valentine's Day

Non-crafty:

Went south the previous days. Winter condition was really bad for driving especially gigantic semi-trucks. Really appreciate those who needa work under such tough conditions to ensure that the roads are safe. ODOT, tolltruck drivers, semi-truck drivers (for delivering food to supermarkets hehe). We were stuck on our way back for a long time becoz of a spun out semi-truck, on a single-lane highway.

Lesson earned : fill up the gas tank while you're leaving for a remote city where there's nothing in between... Bad stuffs happen and you can't tell when will you be unfortunately stuck in the woods for 3 hours.. We didn't have enough gas to stay warm for 3 more hours in the cold + the drive back home.

Crafty/Artsy inspirations:

1) Stunned by the beauty when driving in windy snowy conditions in the dark. Look through the windshield the snowflakes are coming at you. If you stare at it for longer, they are like fireworks!! I gotta brainstorm something..

2) It's a wonderful thing that we humans have binocular visions. Our eyes is a camera. As long as our eyes are open we are looking at everything within our field of vision. If you just let everything fly by you quickly as if you're driving at 100 mph, nothing's gonna inspire you. If you're willing to take a seat, do nothing, just look at the same "field of vision" a little bit longer, you'll realize something. I have been pondering why the studies show that people with a messy desk are more likely to have creative thoughts. Probably they just have more stuffs to stare at, thus there's a higher probability of being inspired.

Wednesday, February 12, 2014

Online photo editor

Snow on the roof is melting! Bye icicles!

Found this free online editor. Something simple, free, and more advanced than MS Paint but not as complicated as photoshop.

http://pixlr.com/editor/


Tuesday, February 11, 2014

Aluminium foil greeting card - experiment time!

Another idea hit me today. Why can't we have Aluminium foil greeting cards? Back at high school I used to wrap my textbooks with wrapping paper or cellophane. Now the technique is useful again! 

1) Trim the Aluminium foil so it's slightly larger than the size of the card base. 
2) Wrap the foil around the card. Press firmly along the edge of the card so the foil stays.


3) Use embossing tool and some stencils, add the patterns you want! As an experiment I tried some hearts, bubbles and smiley. Be gentle with Aluminium foil though. 


It's a different kind of beauty when you have only one element in a card. What a wonderful discovery!

Monday, February 10, 2014

Seattle weekend

Spent a short trip in Seattle last two days. I wanted to visit the Asian Art Museum but time didn't permit. Went to the Bellevue Art Museum and it was a pleasant surprise! Gonna share the beautiful inspirations soon. :)

Friday, February 7, 2014

Aluminium foil origami FUN

Got so much snow!!! Wanna go out and make snowman!! [The end]

This idea hit me while playing with Aluminium chocolate wrap - can we do origami with Aluminium foil?? Last night I finally tried it hehe.

What tempted me is NOT about the silver color. It's about the soft metal properties of Aluminium. Paper is awesome but has its own stubbornness - such as if you fold a paper in half, the paper won't lie flat the way you want it to. On the contrary, Aluminium is like a tame doggy. You could make any shapes out of it!!

1) Here's what I started with - origami paper + Aluminium foil - both of same size.

My lesson learned is - the origami paper used for supporting the foil has to be strong enough. It can't be too thin or the whole thing would be too soft for origami.


2) Glue the two together. In this experiment I applied glue to the shinier side of the foil.


3) Then... do some origami!!

Here's the final product - camellia origami.  See picture below -
1) Crepe paper X thin origami paper
2) Fabric X thin origami paper
3) Aluminium X paper


I've made camellia origami using different materials. Then attempted to flatten them with a tap.

From left to right:
1) Aluminium-with-paper
2) Crunched aluminium foil
3) Aluminium foil
4) Chocolate wrap of aluminium

Here's the result. The foil strengthened by paper is still standing strong. I love how Aluminium and paper get along with each other.


I hope this opens up lot more projects for you! Feel free to share your experiments with me!

Thursday, February 6, 2014

Scrap paper - 3D little decos

Good morning!! Snowing outside again! How I wish to go up to the mountain! Hehe.

Every time when I go to craftstore I get stuck in the sticker aisle for long. They're so good to look at! Peeking into infinity. Peeking into a black hole. But most of the time I grab nothing from that aisle coz the stickers aren't cheap...

Here's another use of punched out shapes - can glue them together and make them 3D!! Tiny and cute ornaments. Good for cards, or other projects you're working on.

It would be awesome if we could have a paper crafters group and we could order stickers in large amount altogether.. Do let me know if you've heard of any!

Wednesday, February 5, 2014

Scraps are awesome!

One good thing to do with paper scrap is - store them away and when you feel like procrastinating, punch them. I like circle and heart shaped punch the most. When time has come, they'll be very helpful. 

Came up with these tonight... so many friends got sick lately :( . The hearts are finally useful! Yay!


Greek letters

It is awesome we have so many cultures and languages on this planet. I've always found Greek alphabets mysterious and elegant. Whether standalone or in a mathematical expressions. What a lovely font to use as most of the alphabets resemble English! Imagine receiving a "Happy Birthday" card in Greek letters!


For lazy folks like me who don't wanna google up how to use Greek in MS Word :
Found this website - for typing greek with a normal US keyboard. After typing that in you can copy the greek letters into wordpad/MSWord and adjust size, color etc.

http://www.typegreek.com/

Tuesday, February 4, 2014

Scan N Cut - how to make the mat sticky again without replacement

A while back I stopped using my Scan N Cut because the mat wouldn't stick anymore. Those mats are not cheap so I searched online to find a workaround to either clean the mat or make it sticky again. Luckily found below blog - the author used Zig 2-way glue to bring her Cricut mat back to life! I tried the same to my Scan N Cut mat, and it worked too! The trick is - don't apply it too thick or it'll be too sticky and will leave some residue on the mat. The glue is really strong.


http://imperfectlybeautifulms.blogspot.com/2010/02/make-your-cricut-cutting-mat-sticky.html

Monday, February 3, 2014

Dry Embossing Stencil - DIY

Dry embossing stencils are not cheap and the patterns available in store aren't abundant. I'm gonna try making some following this tutorial from ehow.com . Will write about it soon. If it works, it would be worth the effort.

http://www.ehow.com/how_12070970_make-dry-embossing-templates.html

+++++++++++++++++++++++++++++++++++++++
Updates -

Tried it with a small circle punch and some cardstock scrap. It was not easy to fold the card in a way that the circles overlap perfectly in every fold. Might get challenging if the stencil you plan to create is more than a simple circle.


Shortcut - If you have a cutting machine, you could do the same by cutting out 8 rectangles with the circle inside it. Stack them and staple them. The alignment will be a piece of cake.

1% of improvement does matter!

Found this on livehacker. Worth reading for crafters as we're on our own and there're so many things that we could optimize, in order to reach our goal.
http://www.lifehacker.co.in/work/The-Value-of-Marginal-Gains/articleshow/29825208.cms

Quote: He explained it as the "1 percent margin for improvement in everything you do." His belief was that if you improved every area related to cycling by just 1 percent, then those small gainswould add up to remarkable improvement. They started by optimizing the things you might expect: the nutrition of riders, their weekly training program, the ergonomics of the bike seat, and the weight of the tires.

Note to self :
- Spend less time on social media
- Lift weights. Healthy body healthy mind.
- Be time-efficient when using computer for any work. Web-browsing could suck up time.
- Work on having a more organized workplace. (It's challenging but do-able)
- Plan ahead for the agenda of the day. Every morning. Make a list.
- Keep writing this blog. Persist!!!

Sunday, February 2, 2014

:D

Hello world! Have been making little crafts since last summer. Didn't start out seriously just thinking that it is fun. But looking at how much fun I've been having from doing it over these months, I decided that it's time to treat it more seriously.

So here I am! Decided to start writing here so I could log down little stuffs and inspirations from daily life and share the techniques which I find useful. There're thousands of millions of blogs out there so I'm secretly hoping that someone will somehow click their way here!